Way back on March 23rd I posted about a Doubles Swap I was doing with my blog buddy, the uber talented, Renee Lamb. What? You don't remember that post? You mean to tell me you all don't have all of my posts memorized. Geez! Well because I'm a nice person (and also can be counted among the seriously memory impaired) I will give you a recap. It worked like this...Renee and I each pulled all sorts of fun scrappy stuff from our stash that we had duplicates of...which by the way in my case was a lot...then we took all the duplicates and did one for you, one for me, one for you, one for me and each made identical kits...in total we each made 4 kits...we each kept 2 and mailed the twins to each other. Got it so far. Good. So once we got our kits the real fun began...we got to scrap with them. Not sure about Renee's take on the kits but I loved them...and I hated them...LOL. The kits themselves were awesome...lots of great papers and embellishments and the second I opened them I started getting a ton of ideas. Problem being I had to find photos to work with my ideas...so not used to working backwards...talk about a challenge. Our intention was to post about 2 weeks after we got them but being that Renee and I are both busy moms 2 weeks turned into 3...3 turned into 4 and well here we are ...30+ days later. But hey all good things are worth waiting for. So it's finally time for the big reveal...time to see what Renee and I did with our matching kits...oh and FYI...I have not seen what Renee did yet and she will see mine for the first time when I post this...exciting right...well it is for us. Your all just along for the ride ;)
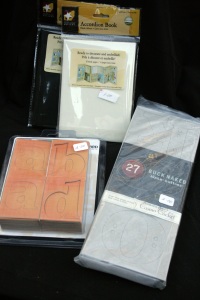
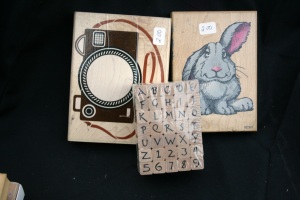
so here is the first kit I sent to Renee... Papers: SEI, American Crafts; Journal Spot, Transparency: Colorbok; Rubons: American Crafts; Brads: Creative Cafe; Rubon Letters: Basic Grey; Photo corners: K&Company
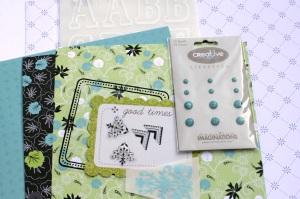
and here's what I did with it...I used the back side of the AC paper which was a dark grey and layered my cardstock over that leaving a border. I didn't want to use the "good times" phrase on the journal spot so I tucked it behind a pic and I also wanted to funk it up a bit so I layered the transparency over it to make it a little edgier. Did lots of layering to make the background and hand drew a border to connect my photo corners and brads. I applied the rubons to the brightest paper and fussy cut around them to create the title. Sorry for the wonky colors on all the pictures...I edited these at 2 a.m. ...apparently not the best time to edit pics.
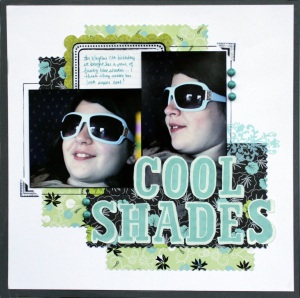
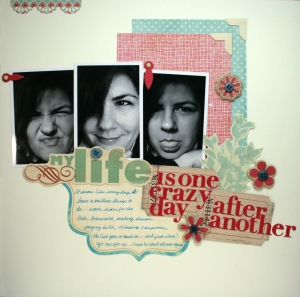
This is the 2nd kit I sent to Renee... Papers, Die Cuts: My Minds Eye; Chipboard flowers: Lil Davis ( I think); Journal Spot: Making Memories; Letter Stickers: Heidi Grace; Tickets: Tim Holtz; Photo corners: Heidi Swapp; cardstock: Bazzil; buttons
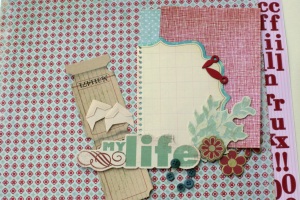
and heres what I did with this kit... the whole kit was really matchy matchy and the colors were on the sugary sweet side which I didn't really realize when I put it together so to funk it up a bit I used black and white photos and put the photos and title at angles. Some quick layering and voila ...done.
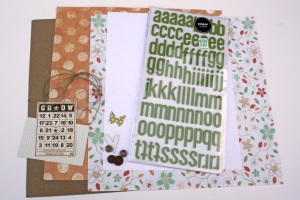
Here is the first kit I got from Renee...totally loved it...more My Minds Eye and lots of cool embellies to play with...
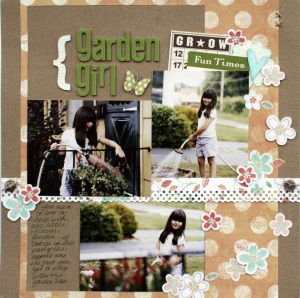
and here's what I did with it... had to go way back in my albums to find pictures that would work for this LO...that's my cutie pie daughter way back in 2003. I decided to something a little funky with the orange paper and did a large cut out frame then I fussy cut some flowers from the patterned paper and scattered them across the LO. I needed some more embellishments so I cut off the cute graph paper portion of the "fun times" journal spot and used it to make the bracket near the title and a cute scalloped circle.
and here's the 2nd kit I got from Renee... this kit was so pretty but the colors stumped me at first. Can't remember who the papers were from...journal spots: K&Co; thickers: American Crafts; cardstock: Bazzil; bling: michaels...not sure about the rest.
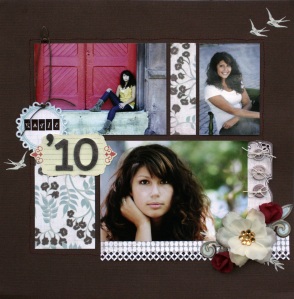
And here's what I did with this kit...which by the way was the hardest for me to work with but ended up being my favorite kit of them all. Because I was working with a variety of colors...brown, red, ivory, aqua and orange...I decided to use some various photos with a variety of colors as well. These are pics I took for my niece for her senior photo shoot...isn't she just gorgeous. When I first started the LO I didn't have an idea for the arrangement but since this weeks Lizzie K Challenge on ClubCK was to work with grids I decided to do my LO in a grid...totally worked for this LO. I layered 2 of the journal spots to create a background for my simple title and used the other one as a border for one of the photos. Cut up the prettiest paper and put a few pieces in between the pictures and then used the other paper to create a fun border. then I stitched around the whole cluster to add a little more red to the layout. The white white of the letters and buttons didn't work for my LO so I inked them both. I had the hardest time working with the flowers and the fleur de lis...had no clue where to put the fleur de lis and I rarely work with flowers and was having a heck of a time getting an arrangement I liked. Finally got a brainstorm on how to use both...you can see the close up shot of what I did below.
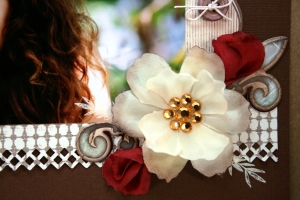
here's what I did with the 4 flowers and the fleur de lis that were in the kit... I cut the fleur de lis in half to make them look like leaves and I layered the ivory flowers to create the large flower and then made buds with the 2 red flowers...I will be posting the how-to for the flower on my blog tomorrow.
With the exception of the little letter stickers on the last LO, some inks and border punches, I didn't use any other product on my layouts except for what was in the kit. I also managed to use every element that was provided in each kit in some way.
This was totally fun and a wicked challenge...glad that its done and so looking forward to doing it again...hint hint...if you have your own blog and are interested in trying this challenge just let me know.
Now I'm off to check Renee's blog to see what she did...can't wait to see but I'm betting they're all amazing.
Thursday, April 29, 2010
Tuesday, April 27, 2010
Note to self
Wearing jewely while you scrap is a bad idea. I wasn't thinking tonight and I sat down to scrap and had bangle bracelets on...METAL bangle bracelets...was working on a layout and was using my trusty Basic Grey MAGNETIC mat to keep it all in place...you know the one with all those super strong MAGNETS... see where this is going ...I reached over to grab something and went to pull my hand back ...and yep you guessed it...my bracelets caught on the magnets! Those little suckers are strong ..had to give a good yank to get my bracelets free and pull my arm away then I had to pluck off the magnets and of course fix my layout. So consider yourself warned everyone...stay safe ...keep your scrap space jewelry free.
Monday, April 26, 2010
Ding, dang, darn it Walgreens
So I didn't scrap one darn thing this weekend because I just couldn't think of anything to do with the 3 kits I still had sitting on desk...I was completely and totally lacking inspiration or ideas...so tonight I was determined to come home and scrap. So of course because I am anxious to get home I end up leaving work late (ding dang darn work)...then of course I have to go grocery shopping (ding dang darn kids eat too much)...then I have to cook dinner (again ding dang darn kids). Finally complete all my motherly duties and I get to my scraproom around 7 p.m. and plop down in front of my annoyingly slow computer to hunt for pics. Not even 10 minutes in and the aggravation starts to set in as I am feeling nada...not one iota of inspiration...determined I click on...and on...and on. Seriously how can I have this many pictures and can't find anything. I'm now way more aggravated but even more determined..so I sit click click clicking hoping for the mojo to strike. Finally ...after what seems like an eternity I find pictures for LO #1....so click click click ...I edit and upload. Inspired by my recent success...I continue to hunt for more pics. Bam!...find pics for LO#2...hot damn I'm on a roll...click click click edit and upload ...bam!....find some more...just a little bit more clicking and I will be home free. Finally have all my prints edited and uploaded and have them all added to my cart ...feeling super lucky now because I even have a coupon code to use and as I am clicking away the ideas are swirling away...just one short hour away and I will be scrapping! So excited to finish I enter the code and maneuver my mouse and hit continue...select the store down the street and again hit continue and ....ERROR MESSAGE!!! UGH...try again...ERROR MESSAGE!!! UGH UGH and UGH some more. OMG it's already 9 p.m. and I can't get my picture order to go through...WTH? ...so I dial the Walgreens down the street and politely inquire...que pasa? To which I'm told...sorry ...we're down for the night! To which I reply with a great big Charlie Brown ...Lucy pulled the football...UGGGGGGGHHHH! Come on. Really. Decide that I don't want all my hard work and mojo to go to waste so decide to order from another location not too far from my house...again get my order all set and get to the store selection and find out that instead of getting my photos in the usual hour time frame I will not be able to pick them up until 8:22 a.m. ...WTH? Ding Dang Darn it Walgreens. Can't you give a scrapper a break...really. So seeing that my boss won't be giving me tomorrow off to scrap I will now have to make the trip after work to the store out of the way so I can pick up my pics and finally get some scrapping done.....it's nights like these makes me wish I had a photo printer all my own.
Friday, April 23, 2010
Fabulous Friday Finds
Happy Friday everyone! So stoked its almost the weekend...looking forward to spending tonight and tomorrow scrapping away...hope by Sunday I'll have tons of mah-va-lus creations to share but for today I decided to share some other designers brilliant work and tips...
The oh so talented Cindy Tobey used a popular technique for making flowers to create this super adorable bird's nest ...such a super stinking cute idea...love it.
Spent some time surfing the 2peas gallery and found some really awesome projects like this fabulous birthday card by pinkflamingo25...makes me want to bust out the primas and get busy. Check out this amazing layout by Kansas021...caught my eye right away...totally fun and full of energy....I love layouts that convey the theme without being theme-y...kwim? ...I totally get the fun carnival vibe from all the all the fun paper accents she used but it's not overly theme-y or cheesy.
Not to be outdone by the gals on 2peas...I found some amazing creations in the CK Gallery as well...check out the super cute paper pierced birdie the uber talented carkareokequeen (Beth) made and I love the heart stitching...going to have to find out how she did that...love it! And speaking of super cute paper piecings....you just gotta to love that create a critter cart from Cricut...lovetoteach23 (Susan) posted a few samples her kids made...so cute! Oh and I so have to find me some these amazing corrugated letters on this cute layout by buffyfan (Jen)...guessing they are from AC but I have no clue...anyone want to link me up and do a little enabling here. Also on CK I found this super helpful tip from Amanda for getting your ribbon on straight...you can check it out on her blog.
Tons more caught my eye but I eventually have to do some work today so that will all for today...have a great Friday everyone!
Thursday, April 22, 2010
I am back and I am so behind
Well this past week was easily one of the most difficult of my life but we all got through it and my family and I are slowly moving on with our normal everyday routines and letting the healing begin...it will be a long journey but luckily I have my family and friends to lean on for support. To all of those of you who left me words of sympathy and caring...THANK YOU SO MUCH...from the bottom of my heart I appreciated each and every kind word. Your support and kindness really helped me through this week.
For me getting back to life as normal means getting back to work, housework and of course scrapping...which I have deeply missed this past week. I really needed my scrapping therapy but was just too exhausted to do anything. I was hoping to get something done last night but I had so many errands and so much other stuff to catch up on I really didn't get much time at my scrapping table. Sat down long enough to realize I am way behind....I missed last week's Lizzie K Challenge that I'm doing and almost forgot to post this weeks ...I have a Chinese Whispers Challenge LO to do and a bunch of LO's still to do for the Doubles Kit Swap...YIKES! On the plus side, I'll have plenty of projects to keep me busy...on the down side the list seems a bit overwhelming. Can't wait to sit down and dig in to the pile and make some progress...always feel better about daunting to-do lists when there is some forward progress. With any luck I'll even have something fun and scrappy to post in the next day or two. Keep your fingers crossed for me and send me whatever mojo you can spare...I'm sure going to need it.
Friday, April 16, 2010
This is...
more than a just a picture of a crappy water heater...
This is a vivid reminder to me why taking pictures and recording memories are so important.
See this is a picture of my mom and dad's water heater...the same water heater that this past Sunday broke and flooded their cellar...causing my mom to call me, my brother and sister and beg for help....we in turn grabbed our children...and off to mom's we went. There I found my 2 oldest nieces decked out in funky rain boots doing a bucket brigade while we ran around trying to find the main water shut off. During the next four hours my sister and I bickered as we usually do about what to do first and how to do it best...my brother put in his headphones in order to drown out me and my sister...we scolded my dad for wanting to keep a soaking wet vcr that was in need of repairs and he had kept for 10 years...and we vacuumed what seemed like endless amounts of water and hauled nasty wet stuff out to the yard...not exactly a fun day. But we were all together...and as we often do...we managed to find the lighter side of the situation...there was lots of work...but plenty of smiles and laughs. Once most of the chaos was under control I asked my dad to get his camera....and of course a few eyes rolled...but I told him that even disasters deserved to be documented.
Two days later on Tuesday April 13th my dad suddenly collapsed and died almost instantly...he was only 61.
Since that day I have cried more than I can ever remember crying before. As you can imagine my whole family was devastated.
But during this unbearable time of grief this picture of this crappy water heater has brought me some comfort....Tuesday after we learned of his death, we all went back to my mom's where we sat and talked and consoled one another ...at some point my sister said that this water heater was a blessing...it brought us all together unexpectedly for one last time...after she said it out loud more than one of us acknowledged that this thought had occurred to us as well...and as we sat there and tried to cope that day...I realized how special this picture was...I realized that this simple image of a rotted old water heater was now one of my most prized photos and that this one picture would tell a very important story...I knew then that this photo was as precious to me as baby pictures of my children or the last photos I had of my grandmother. Someday when the time is right and I can bear it...I will record this memory like I have so many others and I will treasure it.
So the next time someone asks you why you scrap...tell them it's memories like these...simple moments in our lives that become memories we will have to treasure forever.
Monday, April 12, 2010
got a little punch crazy
So in my last post I gave you a sneak peak of the last card I made...
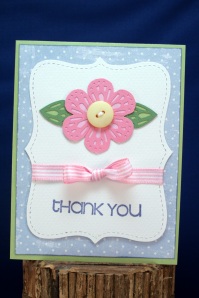
I said I didn't want to show it quite yet because I did something really cool ....so cool I thought it deserved it's own post and being that I am keeper of the posts I can do stuff like that.... so...without further ado here is my super fabulous finished card.....
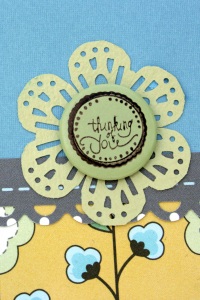
bet your thinking it's not so fabulous...your probably ready to storm off in a huff because I made you wait for a plain ol ho-hum card right...well stop right there... it's not really the card itself that is so fabulous...although it is stinking cute...but it's the detail on the card I want to share with you...take a closer look.....
see that super cute flower...I made that...I stamped the sentiment on the jumbo brad with stazon...cool right...but that is still not what I wanted to show you about this awesome flower...what's totally awesome about this flower are the petals...more specifically...what I made them with...got any guesses what I used?
I made them with....drum roll please...
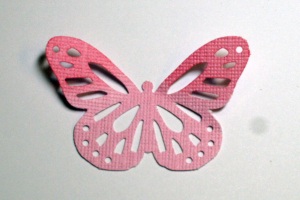
this...
Cool right! OK I know it's not man on the moon spectacular or even Bon Jovi live awesome ..but on the scrappy scale of cool...it's up there...at least it is on my scrappy scale. I just love when I get brilliant ideas like this..(inserting random thought here...when I typed brilliant couldn't help but think of Jerry Espinson from Boston Legal...man I love that show)...anyways...like I said I thought it was a totally brilliant idea. Of course it was 1 a.m. when I came up with it and I'm easily impressed at that hour (that's what she said...ba dum dum).
Anywho... regardless of whether or not your super impressed or just mildly interested....I thought I would share the super complicated instructions...sorry no video tutorials here...I need to have my master Obi-Wan teach me the ways of the video camera next time I see her...but I did take some photos as necessary for any of you who need visual aids...so here they are...the super complicated instructions...
How to make a filagree flower...
Step 1...punch 3 butterflies
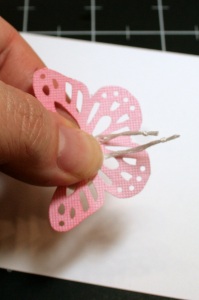
Step 2... cut the top part of the butterflies wings as shown in the picture...
Step 3: Assemble your butterfly petals as shown...
Step 4: Add a cute brad, button or other detail for the flower center and voila...
you have an adorable filigree flower as shown here...
Easy peasy lemon squeezy right! Super cute right! I even earned extra extra bonus points for creativity on this one because I used some of the loopy bazzil border to make the leaves for my flower.
Since I had so much fun making the first one I decided to play mad scientist and keep experimenting with the punch to see what the heck else I could come up with...and what I came up with was sheer paper botanical bliss...at least I think so.
For my second incarnation of the filagree flower I didn't go too crazy...just did a slight variation of the original flower...this time I mounted the 3 petal pieces on a contrasting background and trimmed around them...ooh soo pretty...
Decided my flowers needed some leaves so with a few more snips ala Edward Scissorhands I was able to create some adorable foliage for my fauna...again super easy to do.. (sorry no pic...I was in the zone...couldn't stop for the camera) ...you just have to take one of your petals and trim 1/2 of it off so it looks like a tear drop shape....looks super dooper cute with different shades of green.
So after I mastered the art of leaf making my mind was in creative overdrive trying to think of even more things to do ... and then bam ...the idea hit me...a flower bud! So a little inking here...a little gluing there and tada.......
Jaw dropping cool right! I even amazed myself with this one...looks even prettier in person. And yes I know ink here and glue there are super vague instructions...don't worry I got your back on this one...took some pictures for you so you could see how easy it is to assemble. I also jotted down the directions for the 3 dimensional version I made to go with my bud....
here's how you make the bud...
Step 1: Punch 1 butterfly...DO NOT CUT IT!
Step 2: Using a darker color, ink the top edges of the top of the wings as shown...then flip it over and ink the lower edge of the lower wings.
Step 3: Cut a small piece of white embroidery floss...tie a small knot in each end...trim open ends close to knots...fold floss in half...place in center of butterfly as shown...
Step 4: Bring the top edges of the butterfly wings together and overlap them (inked edges facing in) to make a cone shape as shown...use some adhesive to secure the wings in place. Note...in the picture mine are not completely overlapped...use the holes on the top of the wing as guide to line them up correctly...
Step 5: Pinch the bud cone slightly so it flattens a bit and then it's ready to adhere to your card or LO.
And here's how you make the dimensional flower...
Step 1: punch 6 butterflies and cut to make 6 petals
Step 2: ink the outside edge of each petal
Step 3: make one flower on cardstock, trim away excess cardstock
Step 4: make second flower over first flower only adhering petals in the center
Step 5: roll the edges of the top petals up to add dimension
Step 6: add embellishment to flower center
So are ya impressed yet? I hope so!
I guarantee if you own this punch you will be getting a lot more use out of it...and if you don't own this punch...what ya waiting for!
Sunday, April 11, 2010
Good to last scrap
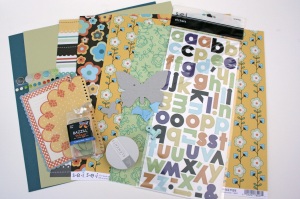
So Friday night I sat down to play with this really super cute kit my friend Meg sent me as part of the doubles swap I'm doing....
Wasn't quite sure what to do with it when I first got it...the kit was really great but outside my norm so I was a little stumped. Was a little baffled by the colors and patterns...separately I liked them all...together they were overwhelming me ...my brain couldn't process how to put them together...decided the best course of action was to divide and conquer...I picked my favorite pattern..the yellow one...and the really strong teal cardstock and went from there. Luckily I was able to dig up some old photos of my daughter I hadn't scrapped that went perfect with the colors.
By the end of the night I had finished one LO...
Busted out the acrylic paint for the title letters so they would work with the LO...which I knew I would have to do when I saw the kit...I never have much luck with those multicolor packs of letters...always one letter in the wrong color and super picky me just can't have that...matchy matchy is way more my style. Lucky for me one of the papers in the kit was all borders...I heart borders... so I was able to cut out the fun orange one for this LO. Had some epoxy dots that I wasn't sure what to do with but I ended up using a large one for the dot in the title and used the little multicolor ones for fun flower centers.
So after I did this LO I still had tons left from this kit to use so Saturday I decided to see what else I could create...this time I decided to focus on the brown patterned paper, the softer colors and the large chipboard butterfly to make another LO and this is what I came up with...
Again I had to go way back to find photos that worked...luckily both my kids did field trips to the butterfly conservatory when they were younger ...decided the colors in my sons pictures worked better for this LO than my daughters. Used my trusty martha stewart butterfly punch to make the really cool butterflies from the brown patterned paper...love how they came out. Spent about an hour playing with the large chipboard butterfly to use as an accent on this LO...totally loved how it came out...but it didn't work with the LO so I had to try something different...so instead I traced around it onto some of the teal cardstock from LO #1 and handcut the details with my cutterbee knife...which looked much better. Used more of the borders including a piece of yellow to make the tag and the notebook edge.
So once I finished that LO I still had that really cool chipboard butterfly that I spent all that time on and I really wanted to use it so I decided to make a card...
Isn't that butterfly cool? Used lots of different inks to get the final effect. As for the card itself...it took forever...card making is so not my forte. Luckily my late night chat buddy Em hooked me up with a link for some cool card sketches and some much needed inspiration. Even though this one was a total PITA to make...being the glutton for punishment that I am I decided to make some more and see how much of the scraps from this kit I could use up...
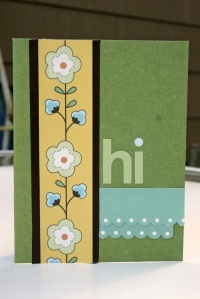
so I made this card...
Cute right! The little strip of flowers was a scrap from the first LO...glad I kept it ....it was perfect for a card.
Since this card went so well..
I made another...
Totally love how this card came out...the back of one of the papers was actually a soft mint green so I was able to use that a lot for accents...I punched the butterflies out the mint green and then inked them to make them bolder. So pretty.
so since by this time it was only midnight I decided to make another...
This one was a bomb...not happy with it at all...I really wanted to use the velvet paper Meg sent in the kit and I had the hardest time with it and I'm afraid I didn't really do it justice. Oh well..win some..lose some...
but even after this failure...
I made another....
Fun and simple...played with more of the borders...ran it through my crimper...after I dusted it off that is....haven't used that thing in ages...but some of those old tools are so fun to play with once and while.
still had more stuff left so
I made another...
Decided to use that bold brown pattern straight up this time...totally love it...painted some more letters for the sentiment and to make them extra fun I stickled the heck out of them.
At this point it was about 1:30 a.m. and I had very slim pickings left but I managed to get one more card done out of the scrap pile... but this one you only get a sneak peak of...I figured out how to make something really cool and I don't want to share it just yet....I'll post the rest of it tomorrow...trust me it will be worth the wait.
As for the kit...the scrappy math works out like this...1 kit = 2 LO's + 7 cards and the only remainders were some random letters, 3 epoxy stickers and a small square of velvet paper. Pretty darn good if I do say so myself.
Friday, April 9, 2010
Winner winner chicken dinner
Just got an email from acherryontop.com ....I won their March Sketch Contest and my prize is a $10 gift certificate to ACOT! Woohoo! More scrappy stuff for me! Sweeet!
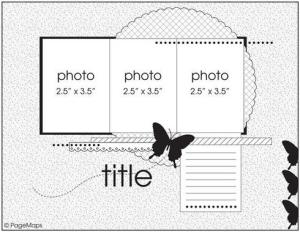
Here's the sketch I picked...
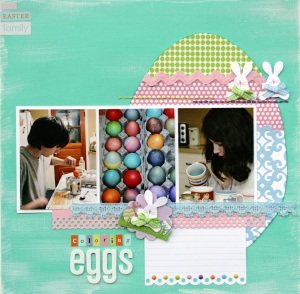
And here is the LO I did...
I changed the sketch from 11 x 8 1/2 to a 12 x 12 and replaced the circle with an egg. The LO is totally outside my normal scrappy style ...pastels and themes are so not my thing ..but I was really happy with how it came out.
So anywho...I entered this LO in the contest and they picked 3 winners from all the entrants...an overall winner, a runner up in paper (ME!) and a runner up in digi. There were so many fabulous entries in their gallery I'm still in shock mine was picked. Yeah for me!
Thursday, April 8, 2010
Why, why, why did I do it?
why did I click that link to scrapbooks.com yesterday...why! Because I'm like a big stupid moth to a flame when it comes to cool scrapbook stuff that's why. I still can't believe I shopped yesterday...I am have major day after regrets....you know that kick in the ass feeling after the shopping high wears off. I mean really what was I thinking...I just spent money at the LSS last month and I have CKC at the end of this month so why oh why did I have to spend money...I should be saving every penny for CKC. I had no intention of shopping yesterday...none whatsoever...I'm not even an online shopper...I am touchy feely shopper so I prefer the old fashioned brick and mortar stores. But yesterday I got sucked in big time. It all started innocently enough...I was blog hopping...while blog hopping I found this super cute project on lolly's blog ...totally loved it...she used a sizzix lilac die to make it...which I don't have...so lucky for me she was kind enough to include a link for the die which was available at Scrapbooks.com and so like a complete and utter moh-ron I clicked the link and BAM...just like that ...trouble. I mean really how stupid was I yesterday...I knew it was online store...I knew I shouldn't spend money but I clicked all the same. I just wanted to look...what's the harm in looking right. Well I looked at the die and I really wanted it and the counter said only 2 left...so like a trout with a wiggly worm in front of it...I took the bait. Right into my cart it went. Of course I could have just checked out but no...that would involve using brain cells ...which apparently confronted by my shopping rush ...decided to take a vacation. So I click on the "new products" tab and begin to browse. And that's all I was doing right up until I found the new EK Success compact border punches. As soon as I found those I was doomed. I put 5 in my cart. YIKES! If that wasn't bad enough I kept shopping...found some Jenni Bowlin and Crate Paper stuff I just had to have...more clickety click. Finally decided enough was enough...not because I was done shopping...but because it was almost time to go home...and yes...I was shopping at work...I know...tsk tsk. So anyways I finish shopping and go to check out and my total was over $100...OMG! So now I do some more clickety click and start deleting some stuff...including 3 punches :( . I did manage to get my total down to a more respectable number but I was still shaking my head...of course all the while I'm shaking my head I was getting out my credit card....funny how that goes. So I hit the send button and that was that...so now I sit here...feeling the dreaded shopper's remorse....and I don't have my scrappy goodness in hand to console me...sure hope that UPS man hurries up.
Tuesday, April 6, 2010
Lift me, link me
It was recently pointed out to me that that there's been a lot of lifting of my layouts going on lately and let me just say I am absolutely thrilled that my layouts are inspiring so many other scrappers. Seriously it is the biggest compliment to me that someone likes something I did enough to copy it or be inspired in some small way. I absolutely love creating and the fact that what I create inspires others is just wicked awesome (yes I said wicked and awesome...I'm a born and bred New Englander stuck in the eighties...deal). I think it's a hoot that people ask if it's OK to lift my layouts...um heck yeah... I have no problems with anyone lifting my work ...well ...unless of course your not lifting but copying most of it or the whole thing and call it your own and/or submit it...then we gots us a problem and I'll have to send Lenny the Leg Breaker to visit ya....but hey other than that...it's cool. Lift away! Just do me a huge favor...if you lift me, link me....I would so love to see what you've created. I have so much going on with challenges, boards, blogs, scrappy projects, etc. that I just know I'm missing out on seeing some really great work. So please...if you lift me, be a dear...and link me.
Monday, April 5, 2010
Scrappy stuff for sale
So it's spring...you know what that means...chirping birds, blooming flowers and heaping piles of clutter. At least at my house anyways. Spring is that time of year I rip apart my house room by room parting with anything unused and unloved....that is if I can get to it before the kids and hubby hide it. They have this thing about me throwing out or selling their beloved crap...don't know why. So this year in the interest of sportsman like conduct... I started the yearly purge in my scraproom of all places. When it comes to the cleaning and purging to do list my scraproom is usually not included ...my scraproom is very organized and I always figured as long as it has a home...it's a keeper. But recently I've decided it was time to ditch that logic and start ditching some stuff ...most of which has been doing nothing more than collecting dust. Decided I would work my way around the room and go through everything...so far I've only manage to get one bookcase done in 2 weeks but ..oh well ...at least it's a start. I did fill one whole box though so that's really good...now I just have to get rid of it all. The plan was to put whatever I purged out for my semi annual tag sale and then haul the rest to the LSS tag sale sometime down the road but since I now have a blog I'd thought I would see if I could hustle...I mean sell..some of it to any blog readers that might be interested. Here's how I'm doing this...shipping is actual cost, payment by paypal only, will ship after payment is received, will trade for other scrappy goodness but only if I "know" you, feel free to ask whatever you'd like and yes I will give you a heck of a deal if you want to buy more than just a few things. So without further ado...here is my pile of stuff for sale...
Brand new...24 piece koh-i-nor pencil set $6
accordion book - black or white $1 each
Cosmo Cricket Chip letters (Missing A-R-T) $2
Cloud Nine Chip Letters $2
Paper Studio Roller Stamp - Love - New $2.00
Provocraft Roller Stamp - $3.00
7 Gypsies self inking stamp "writers block" - $2.00
Comotion Rubber Stamp - Denim Pocket - $2.00
Hero Arts 28 Piece Alpha Set - Calligraphy Curls - $3.00
Stamp Craft - 6 pc Wedding - New -$2.00
Stamp Craft - 6 pc Garden - New - $2.00
Stamp Craft - 6 pc floral - New - $2.00
EK Success Script Numbers - New - $2.00
Stamp Craft Alphabet - Greek Stone - New - $2.00
Stampede Rubber Stamp - Camera - $2.00
Comotion Stamps - Bunny - $2.00
Stamping Up - Sweet Dreams - New - $9.00
Stamping Up - Wonderful You - New - $10.00
Mary Englebright Stamps - set of 27 - $7.00
4 Random Stamps - $2.00
Pearl Ex 12 Piece Powdered Pigments - NEW - $8.00
SOLD - Jacquard Dyna Flo Inks - New - 9 pc - $3.00
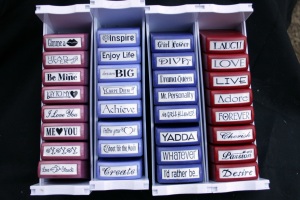
4 different sets...Self Inking Stamp Set - 8 pc - $3.00 each set
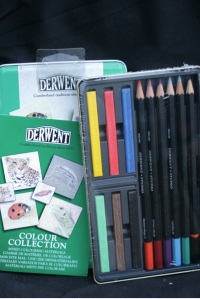
Derwent Colour Collection 12 Piece art set - NEW - $2.00
Bazzill Chip Pack -New - $1.00
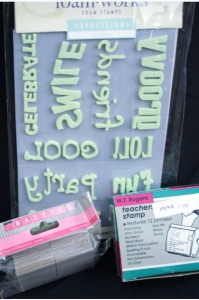
Inkadinkadoo Foam Stamps - New - $1.00
Roller Stamp - Teacher - $1.00
Saturday, April 3, 2010
To teach or not to teach
that is the question of the day. I was just asked this morning if I would like to teach scrapbooking classes as AC Moore again and I'm not sure if I should. Trying to weigh the pros against the cons.
The pros: 1) I've taught there before...both beginning scrapbooking and layout classes ...2) I enjoyed teaching..... 3) it's extra income..this is the biggie for me....I can set the cost of the class and I keep the full class fee....4) good experience...teaching there could help me get better teaching jobs elsewhere
The cons: 1) lots of preparation involved ...have to make a class summary sheet, coordinate the dates of classes, make a materials list, make a class sample, etc. ....2) teaching would take time away from my own scrapping...3) have to use only AC Moore product...which can be tricky sometimes...especially now that they are changing that department over ....4) last time I taught there was very little promotion for the classes ...no promotion equals little or no students.
Part of me really wants to do it because I have lots of great ideas for classes and I think I would really enjoy it once the classes get going but I know in the beginning there is a lot of grunt work involved and that it will take a while to build a base of students. My biggest concerns are things I have no control over...the class promotion and scheduling. The last time the class promotion was weak to say the least...I'd make class samples and they would get stuck in a place where noone would see them...I asked to have signage in the scrapbooking department and that never happened....and since its a larger store...promotion is key. The other big problem is the class schedule...the Wilton cake classes get top choice on the schedule of classes and they usually take the best time slots so of course that leaves just a few random slots open for anything else AC Moore wants to offer. I did talk to the woman today who asked me to come and teach and she said they are trying to do better promotion but I don't thing a posterboard hung 25 feet above the shopping carts is really going to be seen by too many people.
I've got some time to mull it over ...she's supposed to call me in a week or so to follow up...got to say at this point I'm leaning towards no....unless of course I can negotiate and get them to throw in the employee discount.
Friday, April 2, 2010
Look what I had to make
an Out For Publication image! I had to make one because I just found out one of the layouts I submitted for a page call is getting picked up for publication! Woot! Woot! So stinking excited! I've submitted 7 layouts in the last couple of weeks and was keeping my fingers crossed that at least one would get picked. So stoked by the news...really made my day...night...week. I've been published twice before but this is the first time one of the layouts I've submitted for a page call was chosen so I'm extra excited. I'm not supposed to say which magazine or which layout...their rules not mine...so for now it will have to be a surprise. So of course now I have to make sure the LO isn't posted anywhere and if it is...I get to replace it with this...
Yippee!!
Thursday, April 1, 2010
Huge giveaway on my blog
Scroll down to see my huge giveaway...
.
.
.
.
.
.
.
.
.
.
.
.
.
.
.
I told you it was huge!
April Fools!!!!!!!!!!!!!!!!
Subscribe to:
Posts (Atom)