Tuesday, September 20, 2011

Day whatever

So at this point I figure there is no longer any point in numbering the days since obviously I have not been on schedule for sometime but for those of you that have a need to know which day this should be...it should be day #6. Hooray!! That means this is the last post before I post that video I've mentioned like 100 times. But that's tomorrow...today we have no video but we do have a picture...


ta-da! my latest creation. I love it...hope my hubby does to...I made it for him...but that's a secret so shhhh! OK? OK! What's not a secret is the cool way I created this card ...of course I used alcohol inks and vellum...at this point that should go without saying...but to get this effect I did a masking technique. Masking of course is nothing new but I've never done it with alcohol inks and vellum and really thought the finished effect was pretty cool! What also was pretty cool is the fact that I was able to use some pretty old and otherwise useless stickers for the mask so it was a win-win...got rid of the stickers and got a cool card.
Ok so If your super excited to try this yourself and just need instructions...here's the simple steps to make this...

step 1: cut a piece of vellum about an 1" larger than finished size
step 2: adhere mask (in this case stickers) on vellum ...burnish to ensure good adhesion especially at edges
step 3: using piece of felt and alcohol ink...dab color over entire surface, allow to dry
step 4: adhere additional mask (same as in step 2)
step 5: dab 2nd color over entire surface (same as in step 3)
repeat with remaining mask and colors.
step 6: once inking is complete and dry ... use a piece of felt and black stazon ink to rub-over entire image, allow to dry
step 7: remove mask (stickers) and cut vellum to size
step 8: use spray adhesive to mount image to card and add word strips
super duper simple to make right?
OK so here's some other little tidbits of information I learned along the way that will most definitely be helpful to you...

First...stickers make great masks but you can also use rub-ons or paper die cuts. To use rub-ons...simply rub-on the rub-on and then ink over ...after you've inked...use Un-du to remove the rub-on...the trick to this though is not to remove the color when you remove the rub-on...I was able to remove a rub-on mask successfully by lightly dabbing with Un-du and then using a razor knife to lightly scrap it off. To use paper die-cuts...simply spray back of die cuts with spray adhesive to create a sticker....then apply the same way you would a sticker...only thing you have to be careful of is most die-cuts are paper which means if you get the paper super wet you will get bleed through...so dab sparingly and lightly with alcohol ink and make sure to allow to dry in between applications. As for sticker masks...obviously the best and easiest choice but you still need to know a few things...first...check the color fastness of the sticker...the stickers I used were red and when I rubbed the alcohol ink over the color bled..which is why my yellow hearts have red streaks...no biggie there cause I liked the effect..this time at least...so check first ...second thing you need to know is all stickers are not created equal...some stickers that don't have a glossy finish or that are thinner may get soggy from the ink and then you will have a heck of time getting them off successfully...again check a sample to make sure you won't have issues before starting your project. One last tip about masks...be sure to pick images that have good defined images so you get the best look..you want the outline of the sticker to be crisp and clean...if you can find them...Anita's outline stickers would work great for this project.
As for tips on using inks on this technique ..you have to remember two really important things...#1 ..you are layering color over color repeatedly....soooo you need to know how your colors are going to work together and in what order to use them...I recommend using lighter colors first and progressing to darker shades with each application...in my example I used sunshine yellow, followed by sunshine orange, then watermelon and lastly red pepper....since the sunshine yellow was applied first to plain vellum I got a true color ...well except for the red streaks from the stickers...but when I applied sunshine orange it was over sunshine yellow so I got a mix of the 2 colors...same with the following colors...each color I applied mixed with the previous color. So again be careful in selecting your color palette and deciding what order. And tip #2...use less and do more...what I mean by that is do light coats of ink so you don't over saturate the mask or vellum and do more layers of ink to get intenser colors...by using less and doing more you will get way less bleed-through. Obviously I got some bleed through on my image but I didn't care...can't be perfect all the time.
So that's it for the how-to on how to use mask with vellum and alcohol inks.
Next post...video...I promise!!

Monday, September 19, 2011

Weekend recap with sound effects

So obviously I haven't posted day 6 or day 7 in my series yet..and yes I know I know I know I promised and your all waiting but seriously this weekend was just insane...both good insane and bad insane and a little in between insane...so it just wasn't happening...not for lack of trying though..seriously...I tried...I just gave up in utter frustration... so here's the what and why of my weekend so you can understand why there are no blog posts from this weekend...
first friday...work..ugggh...getting out early...hooray...boss held me up so I got out later than planned...uggh....jump in car to go home...vroooom...rush in and get changed for wake......brush, spritz, etc.....rush back out again...vroom...go to wake of co-workers significant other....hug, sob :( .... rush back out to drive home...vroooom...have to speed pack for scrapping with good buddy Tina....shuffle, thump, crash, shove, zippppp, done....ready to leave...waiting on hubby...ugh...uncle stops by...hi, bye, love u too...hubby finally home...hooray...off to Tina's....vroom....get to Tina's and unload all my stuff....lug, thump, uggh, woof woof (her dog)...finally sit down to scrap...yea!...have witty conversations...blah, blah, blah...try to scrap some more....shuffle, cut, shuffle some more....not making much progress...ugh...time for a beer...glug glug...time for dinner...pizza ...yum...back to scrapping...shuffle and shuffle some more...still no progress...grrr....more conversation...blah, blah, blah...more beer...glug, glug...more failed attempts at creating a layout...uggggggggh! ...discuss new Creating Keepsakes magazine...blah, blah, love that, blah, hate that, blah, like that, blah, blah, blah...gave up in exasperation on layout ...sigh, grrr, wahahaha....decided to have some fun and worked on a layout with Tina...laugh, giggle, laugh, laugh....packed up all my stuff.....ugggh...drove home...vroom...went to bed....zzzzzzzzzzzz.
Saturday... woke up early to shower because they were turning off water sometime after 7 a.m. ...grrr....showered and ate breakfast.. I'll spare you those sounds !! ...drove kid #1 to soccer fundraiser...vrooom, honk, vroom...back home...vroom...drove kid #2 to cross country practice...vroom...back home...vroom....vacuumed my car... varoommmm....picked up kid #1 at soccer fundraiser...vrrooom...back home...vrooom...cleaned the house...too many sounds too list....sat down in scraproom chair to start creating ...ahhhh...screwed up 1st project i made...darn...screwed up 2nd project I made...double darn...made 3rd attempt and succeeded...hooray, yippee....got out camera to photograph project and got interrupted several times...mom! phone...rushed to photograph project because we are leaving in 20 minutes...click, click, click...try to upload pics ...clickety, cli...camera battery dies.. uggggh!!!! ...kid #2 is late coming home...grrr...call kid #2 ...ring, ring, voicemail...call again 10 minutes later....ring, ring, voicemail...kid #2 finally arrives home almost an hour late...grrr....lecture kid #2 about being responsible and calling....blah, blah, blah...finally get car packed and off to vermont...hooray...dad calls to tell me he's in town...um thanks for the 2 minute notice...finally get to vermont...lots to do....dinner...yum...got a text from brother...grandmother is in hospital...again?..finally get to relax with family, a beer and a movie...ahhhhh...bed...zzzzzzz
sunday....woken up at 8 a.m. by neighbors lawnmower....vrrrrrrum (ok so i'm not sure what the noise is a lawnmaker exactly makes but it was loud!!!)...get up unwillingly ...ugghh....lug boxes out for tag sale...lug, lug, lug...spend day selling stuff...kaching!...put everything away...lug, lug, lug...get a call from brother...grandmother has been diagnosed with alzheimers...sob...finally relax with a beer and some dinner...ahhhh...drive home....vroom...unpack car...lug, lug, lug...bed...zzzz
phew...weekend is over.
Now it's monday so the plan is to get my project uploaded and get on with my series....hopefully tonight is less hectic...fingers crossed.

Friday, September 16, 2011

Day 5 - 2 more cards

So here I am again...day 5... talking about the same things again...alcohol inks and vellum....yawn. Seriously big yawn. And no that is not a big "OMG 5 days of the same old stuff this is so boring" yawn...it's actually a big "I'm so exhausted cause I've been spending way too many hours playing with this cool stuff" yawn. Seriously I'm whooped! LOL. By the time I'm done with this series I'm going to need a nice long nap! That is if I can get my brain to stop churning up ideas long enough to get some sleep. Seriously I have vellum on the brain. This morning I was watching the Today show and saw a screen in the back of the host with an image and I was like "Oh snap! that is so cool! I could totally do that with alcohol inks and vellum!" ...so now of course I will have to try and see if I can do it and if it's a success I will probably have to add yet another day to this series. At this rate I am going to run out of vellum long before I run out of ideas. LOL. Anyways enough about projects I am dreaming about and projects I will post in the future...let's talk about today's projects.
Today I have 2 cards ...and of course they both have alcohol inks and vellum...but today they are both heavy on the 3rd element I am supposed to be working with this week...texture...betcha you almost forgot that my inspiration this week was supposed to be vellum, alcohol ink and TEXTURE since I've spent so much time on the first 2. But I didn't forget...actually since the day I pulled the slips from my inspiration jar the first ideas I had for projects had more to do with texture and vellum than alcohol inks. Ironic huh...especially considering I haven't posted anything much at all with texture but can't stop obsessing over alcohol inks. Anyways I was really excited about the texture thing because way back when when I worked at ACMoore I remembered a program we had for embossing vellum...it was called Pergamano. Basically you used a stylus and a stencil to emboss the vellum which would turn a bright white where ever it was embossed...I remember it looked really pretty but I had no real interest in it at the time so I didn't know much about it. So not actually knowing how to do it I decided to just jump in and try it. Well I tried and for the most part I failed. Every time I tried to emboss the vellum would rip ...grrr. I could do small bits of embossing...like the bubbles on my fishbowl card...but anything bigger was an epic fail. So totally frustrated I decided to google the technique and found the answer to my problem along with some super mega amazing projects using this technique....seriously if you have some free time go to youtube and put in pergamano in the search and prepared to be amazed..I spent a ton of time checking them out. Anyways thanks to the videos I was able to find out why my attempts were failing...I was working on the wrong stuff. See I was trying to emboss on vellum when what is really needed for this technique is vellum's beefy cousin...parchment... it looks the same but is much heavier. So after I discovered that little bit of helpful info I knew full scale embossing was out but I wasn't ready to give up on adding texture to my vellum so rather than embossing with a stencil and a stylus I turned to my only/fave embossing folder...swiss dot...to see if that would do the trick and it did!! Hooray! So I embossed a bunch of vellum and got to creating and here's what I made...
Card #1 ...Winter Scene


As soon as I embossed the vellum the first thing I thought of was how much it looked like a snowy sky so I knew right away the first thing I'd be making would be a snow scene. I played around with what to put behind the vellum and decided on a darker dusky bluish purple cardstock...totally love how it looked but decided I wanted to add a tad more detail to the sky so I added some depth to the sky by painting on the back of the vellum ...love the end result and here's how to make it... Step 1..emboss vellum with Swiss Dot folder ..Step 2...turn vellum over and with a large brush lightly brush the back of the vellum with eggplant and denim alcohol inks to create some striations, let dry...Step 3...spray ink side of vellum with spray adhesive and mount to a piece of blue cardstock, being careful not to press on the embossing....Step 4...using a piece of felt, dab alcohol ink around border of embossed piece...Step 5....cut hills out of white cardstock and embellish with stickles, let dry and then adhere to card...Step 6...add twine (shown is lilac twine from the twinery) and card sentiment (my sentiment is a very old embellishment from junkitz...you could stamp a sentiment on piece of cardstock and punch 2 holes on the end to get the same look) ...Step 7... spray the back of a piece of green vellum, layer it over a piece of patterned paper and cut out a tree (I used my sizzix tree die to cut mine), use white paint and glitter to add snow, let dry and adhere to card as shown...Step 8 ...add snowflake embellishments...Step 8...adhere design to card blank.
Super simple and super cute. Although I gotta say I really didn't feel comfortable doing a let it snow card in September...I hope mother nature gets that this card was in no way an invitation to her to bring the dreaded white stuff .... seriously cannot stress enough after last winter how much I do not in anyway want to encourage any snow... unless of course it's December 24th...then it's ok but that's the only exception...and even then it better all melt by December 27th! So since the snow card was giving me the willies just thinking about it I switched gears and made a beautiful spring card because as soon as fall ends I will be counting down the days until spring arrives!! Seriously...I will!
Card #2 - Spring Flowers


So pretttty! I will definitely be making more of these cards. Can never have too many thank you cards. Anyways here's how to make this card...Step 1...emboss a piece of vellum with Cuttlebug Swiss dot embossing folder...Step 2...Using pieces of felt dab alcohol inks on the top of the embossed surface using Meadow, Lettuce and Citrus...working from the corner out, alternating colors as you apply, being careful not to press too hard on embossing...Step 3...spray back of embossed vellum and mount to card blank, trim as needed...Step 4 ..on a piece of vellum (unembossed) use pieces of felt to dab one area with cranberry ink and another area in eggplant ink, let dry...Step 5...once dry, punch flowers from cranberry and eggplant painted vellum...Step 6...using glue dots, adhere vellum flowers and add pearl centers (mine are from queen & co.) and pull flower petals forward a bit to add dimension...Step 7...Stamp card sentiment on white cardstock, cut to size and mount to patterned paper and cut to size, adhere sentiment to card and add bee embellishment and your done! Another super simple but wicked pretty card.
Stop by again tomorrow cause the fun continues.

Day 4 - 4 cards

Yep that's right ...4...count em baby...1, 2, 3, 4 cards to share. After posting my goldfish card the other night I kept looking at it and thinkin it was kind of dullsville...I definitely could've amped it up a bit but I really didn't feel motivated to do it over..instead I started pondering about what else I could make using the same technique. I tried to think of other things that would have liquid in them and the first thing that came to mind was cocktails (no surprise there LOL) ... so I googled some clipart of some drinks and got super inspired to make a margarita and a glass of wine using the same technique as the fishbowl. So just like the other night I sketched out my image, layed the vellum over the sketch and used my alcohol inks to add the liquid....then I traced the image with black pen, mounted it to some white cardstock and cut around the image and then created my cards. Only difference is on some of these cards I actually used a brush to paint on the ink rather than dabbing it on...wanted to have more control over the ink and get a more intense color.
So here's card #1...


Cute right...I love me some margaritas so I realllllly love this card....going to have to decide which one of my lush friends is going to be deserving of this bad boy. I didn't have a saying for my card so I used a Studio-G stamp that says "when life gives you lemons..." so I just stamped the parts I wanted and used a black pen to write in the words limes and margaritas.
So after the margarita card I decided to make something a little tamer...a nice tall glass of lemonade...
Card #2


Awesome right! I used a little bit of painting and dabbing for this one...the lemons are painted but I dabbed the ink to make the lemonade. I amped up the lemonade by adding some ice...just sketched some cubes out on vellum, traced it in black ink, cut it out and laid it over the top of the glass...love the effect. Used the same stamp for the sentiment as card #1 only I used it as is this time around.
Since I was on a roll with the beverage cards I decided to make another...card #3 ...


Spectacular right! I love how this card came out...even though I totally wanted to throw it out the window while I was working on it! Making the wine glass was a piece of cake but the rubons I used for the sentiment were a nightmare...maybe I shouldn't have actually been drinking wine (yummy Reisling!) while making the card. Thank goodness for Un-du cause I had a ton of rubon disasters to remove. Once I got the front of the card done I was going to use rubons to do the sentiment inside but in the interest of sanity I decided to handwrite it. The inside of the card says "wine always make me feel better"...so true...I had 2 more glasses after my rubon fiasco.
After 2 cocktails on paper and a couple real life ones I decided to try something a little different. I was really liking painting with the inks so I decided to try some more of that so here's what I came up with...card #4


For this card I drew a circle and laid the vellum over it...then I used a liner brush to handpaint the wreath using 2 colors of alcohol ink...lettuce and meadow and using the circle I drew as a guide. It is so so easy to paint on vellum with the inks...I just love it. After I painted the wreath I decided I wanted to mount it to the card ink side down because it was a softer look so again I used my spray adhesive to mount it to my card base. After that I stamped my sentiment on a strip of vellum...outlined the edges with a silver permapaque pen and mounted it on the diagonal across the wreath. Then I blinged out the wreath with some stickle berries and a simple bow. Lastly I outlined the whole card in silver. The end result...a simple, classic Christmas card. Oh and speaking of Christmas...please note that it is only September 15th and I have already made a Christmas card. Crazy early right! Well for me it is. Maybe this is an omen of things to come...that I might actually get all my cards done on time this year...yeah right!
Alright...enough blogging for one day ...2 days worth of posts is a lot for one day. Check back tomorrow for even more cool, fun, and awesome ideas.

Day 3 ... a day late

So life has returned to normal tonight...as normal as the life of a mom can be anyways...so now that last night's chaos is behind me it's time to get back to posting projects. Woohoo! If you've missed my previous posts this week I'll recap...today is day 3 (sort of ;) ) in my series of projects using alcohol inks, vellum and texture.

Day 3's project...a layout. Technique wise this layout is nothing spectacular ... but while it lacks in technique it's still a pretty darn cute layout thanks in part to the adorable (yet annoying) subject ...just one of the many crafty ingenious squirrels that manages to outwit our every attempt to keep the birdfood out of their greedy little paws. Darn squirrels. But it's not the pesky little thief who is the real highlight of this layout...nope that honor goes to some pretty amazing vellum...more specifically the totally awesome pink woodgrain vellum I used for my background...totally just love it. I also have it in lime green and it's just as awesome.


The paper was just perfect for this layout for obvious reasons...first it's awesome...which I already mentioned...but second it's woodgrain...so perfect for a layout about a birdhouse in a tree. So using the awesome vellum as a jumping off point for this layout I just had to select a coordinating cardstock...which turned out to be quite the dilemna...had to decide between several shades of pink all of which I liked ...finally just had to let my friend pick ...so if you don't like the color you can blame it on her. After I (she) selected the cardstock I trimmed 1/2 off 2 sides of the vellum and used my spray adhesive to mount it to the cardstock. My spray adhesive is way old and spits and sputters so unfortunately I got some blotches that show through but no it ain't no big thing. After the background was done it was just a matter of arranging the layout and finding a way to incorporate some texture and the alcohol inks. I had some trouble incorporating the inks ...I tried adding splashes of color around the pics but they were more blotches than splashes and after about an hour of struggling I decided to give up that idea. It looked so bad I actually replaced the vellum with a new sheet (lucky I had 2). So after I gave up on the alchohol inks I worked on adding the texture which was so much easier...just ran some polka dot paper (love me some polka dots) through my papercrimper and voila ...a fabtastic border. Finished tweaking the arrangement and glued it all down and added a title and journanling and some super adorable embellishments and I was done...well almost. After I added the title ...those fabulous glossy thickers...I figured out a way to incorporate some alcohol ink!!! I realized since the letters were glossy I could add some oomph to them by sponging a slightly darker shade on the letters...it's super subtle...but hey it counts!!!


Stayed tuned...I'll be posting day 4's projects super soon.

Thursday, September 15, 2011

day 3 - delayed

we interrupt this blog for real life. :(
Sorry everyone ... unexpected events last night left me without enough time to get my blog post done for day 3.
I will play catch-up tonight and post both day 3 and day 4...so you'll get to see a couple projects.

Wednesday, September 14, 2011

day 2 - vellum and alcohol inks

So yesterday on day 1 we covered the basics of working with alcohol and vellum...hopefully my post yesterday was helpful to someone. I know it wasn't all that exciting...after all who wants to read and read and read ...write? (haha get it...write instead of right...as in read and write...oh nevermind) ...anyways like I was saying...I'm sure today your looking forward to something way more exciting...maybe say an actual project? Well your in luck...I do have a project ...I do!! And I actually have step-by-step directions with pictures to boot! Awesome right? I hope so...so without further delay...here's my alcohol ink, vellum and texture project for day 2....


(sorry for the crappy picture...the fish bowl didn't photograph well...the color looks way better in person and sorry also about the mega glare on the fish...camera flash and glitter apparently don't work too well together)
Cute right? I thought so. And it's super easy to make ...here's a list of supplies you'll need...
....Ranger Alcohol Ink in Cloudy Blue ...6 x 6 piece of translucent vellum...blank white card (my card is 5.5 x 4.5) .... ....fish sticker (the one on my card is from sandylion)....black stazon ink.....broad tip black pen (mine is from creative memories but you could also use a permapaque pen or slickwriter)....small scrap of cardstock...rubber stamp (the one I used is from studio G)...piece of white felt (or an alcohol ink applicator)....rubbing alcohol....q-tips...paper towels...stylus...hole punch...spray adhesive and scissors.
step 1... sketch a fishbowl on a piece of paper to use as a template (or you can print one on your printer)...lay a piece of vellum over your sketch. If you have a magnetic mat you might want to use it to keep the layers in place.
step 2...apply alcohol ink to piece of felt or applicator and dab ink over lower part of fish bowl using the sketch underneath as a guide. Don't worry if you go outside the line around the edge of the bowl because we will be trimming that after but you do want to try to follow the top water line. Continue dabbing ink until you achieve the density of color and look you want. Allow ink to dry.


If you got any ink above the water line, use a q-tip with some rubbing alcohol to remove any unwanted ink.


step 3....once dry, use the broad tip black marker to trace around the fishbowl. Allow marker to dry


step 4....cut around perimeter of fish bowl


step 5...using a hole punch (I used both an 1/8" and 1/4" hole punch) punch 1 large hole and 1 small hole in a scrap piece of cardstock.


Turn the fishbowl rightside down over the scrap cardstock...lining up the hole where you want the bubble to be...using your stylus..slowly trace the circle until the bubble is embossed...repeat for remaining 2 bubbles. To make the bubbles more white...turn the fishbowl right side up and put the scrap of cardstock with the hole over the bubble so only the bubble shows...use a q-tip with some rubbing alcohol on it to rub over the bubble and remove the blue ink...repeat for remaining bubbles.


step 6....add fish sticker and stamp sentiment with stazon ink on fishbowl...allow to dry.
step 7....once dry, place fish bowl right side down on a piece of newspaper and lightly spray with spray adhesive ...adhere fishbowl to center of card.
step 8...using a ruler and a yellow broad tip pen add a border to the card
voila! done!
Tomorrow on day 3 I'll share another card with you so make sure you check back.

Monday, September 12, 2011

Day 1 - vellum and alcohol ink

So if you read my post yesterday then you already know that today's post is day 1 in a series of posts this week about 2 totally awesome products ..alcohol inks and vellum...that I've been playing with for the last 2 weeks!!! And for those of you who didn't read my post yesterday...today's post is day 1 in a series of posts this week about 2 totally awesome products ...alcohol inks and vellum...that I've been playing with for the last 2 weeks. LOL.
Since I'll be posting projects showcasing these 2 awesome products all week and this is only day numero uno I thought we'd start out this series nice and slow and begin with the basics...so today boys and girls I'll be sharing some info and tips about vellum and alcohol inks.
Let's start with the alcohol inks...first of all....LOVE them! They are totally amazing! Every time I take them out for a project I end up playing with them for ages....just so much you can do with them. If your not familiar with alcohol inks...here's the basic scoop on them straight from the manufacturers website.
And now here's some things the website doesn't tell you...1st of all the colors are just awesome...I don't have all 48 colors...yet...but I'm working on it!! They also don't tell you how economical they are...those little bottles go a long long long way. It also doesn't tell you how stinkin addicting they are....seriously you can make some seriously awesome stuff with them...just check out youtube for some great tutorials including some by Tim Holtz. One of the things the website does tell you is a little odd...the website says they "create a colorful polished stone effect" ...not sure about that statement...nothing I made ever resembled polished stone and I've used them on lots of things...metal, glass, transparencies, plastic and of course vellum. They are super simple to use...once you know the basics of course...
. . . . . . . .first... alcohol ink has a short "open" time...which means it dries pretty quickly ..usually within 4 to 7 seconds...it sounds like a riduculously short time but it's plenty of time to work with the ink
. . . . . . . . you can buy an applicator to apply alcohol inks but you can actually make your own for less...the store bought applicator is basically just a wooden handle with a piece of velcro on the bottom to which you adhere pieces of felt...you can use a block of wood or something similar to create your applicator and you can purchase a piece of felt for .25 ...way cheaper than the packaged applicator refills.
. . . . . . . . another product you can buy to use with alcohol inks...alcohol blending solution...this solution is used to dilute, blend and lighten alcohol inks...it also cleans alcohol inks from non-porous surfaces ...but instead of buying the more expensive solution at the craft store you can simply buy rubbing alcohol at the drug store for way less...it works exactly the same way as the blending solution. Best thing about rubbing alcohol...it works as an eraser to remove any unwanted ink so if you make a mistake or don't like the results...simply wipe down the work surface with rubbing alcohol and start over.
. . . . . . . . when working with alcohol inks it is really recommended you work on non-porous work surfaces because the inks can and definitely will stain many porous surfaces...my choice of work surface...my glass table top... one more reason to love my easy to clean work surface! Also if you prefer not to have stained fingers and finger nails you might want to consider wearing rubber gloves.
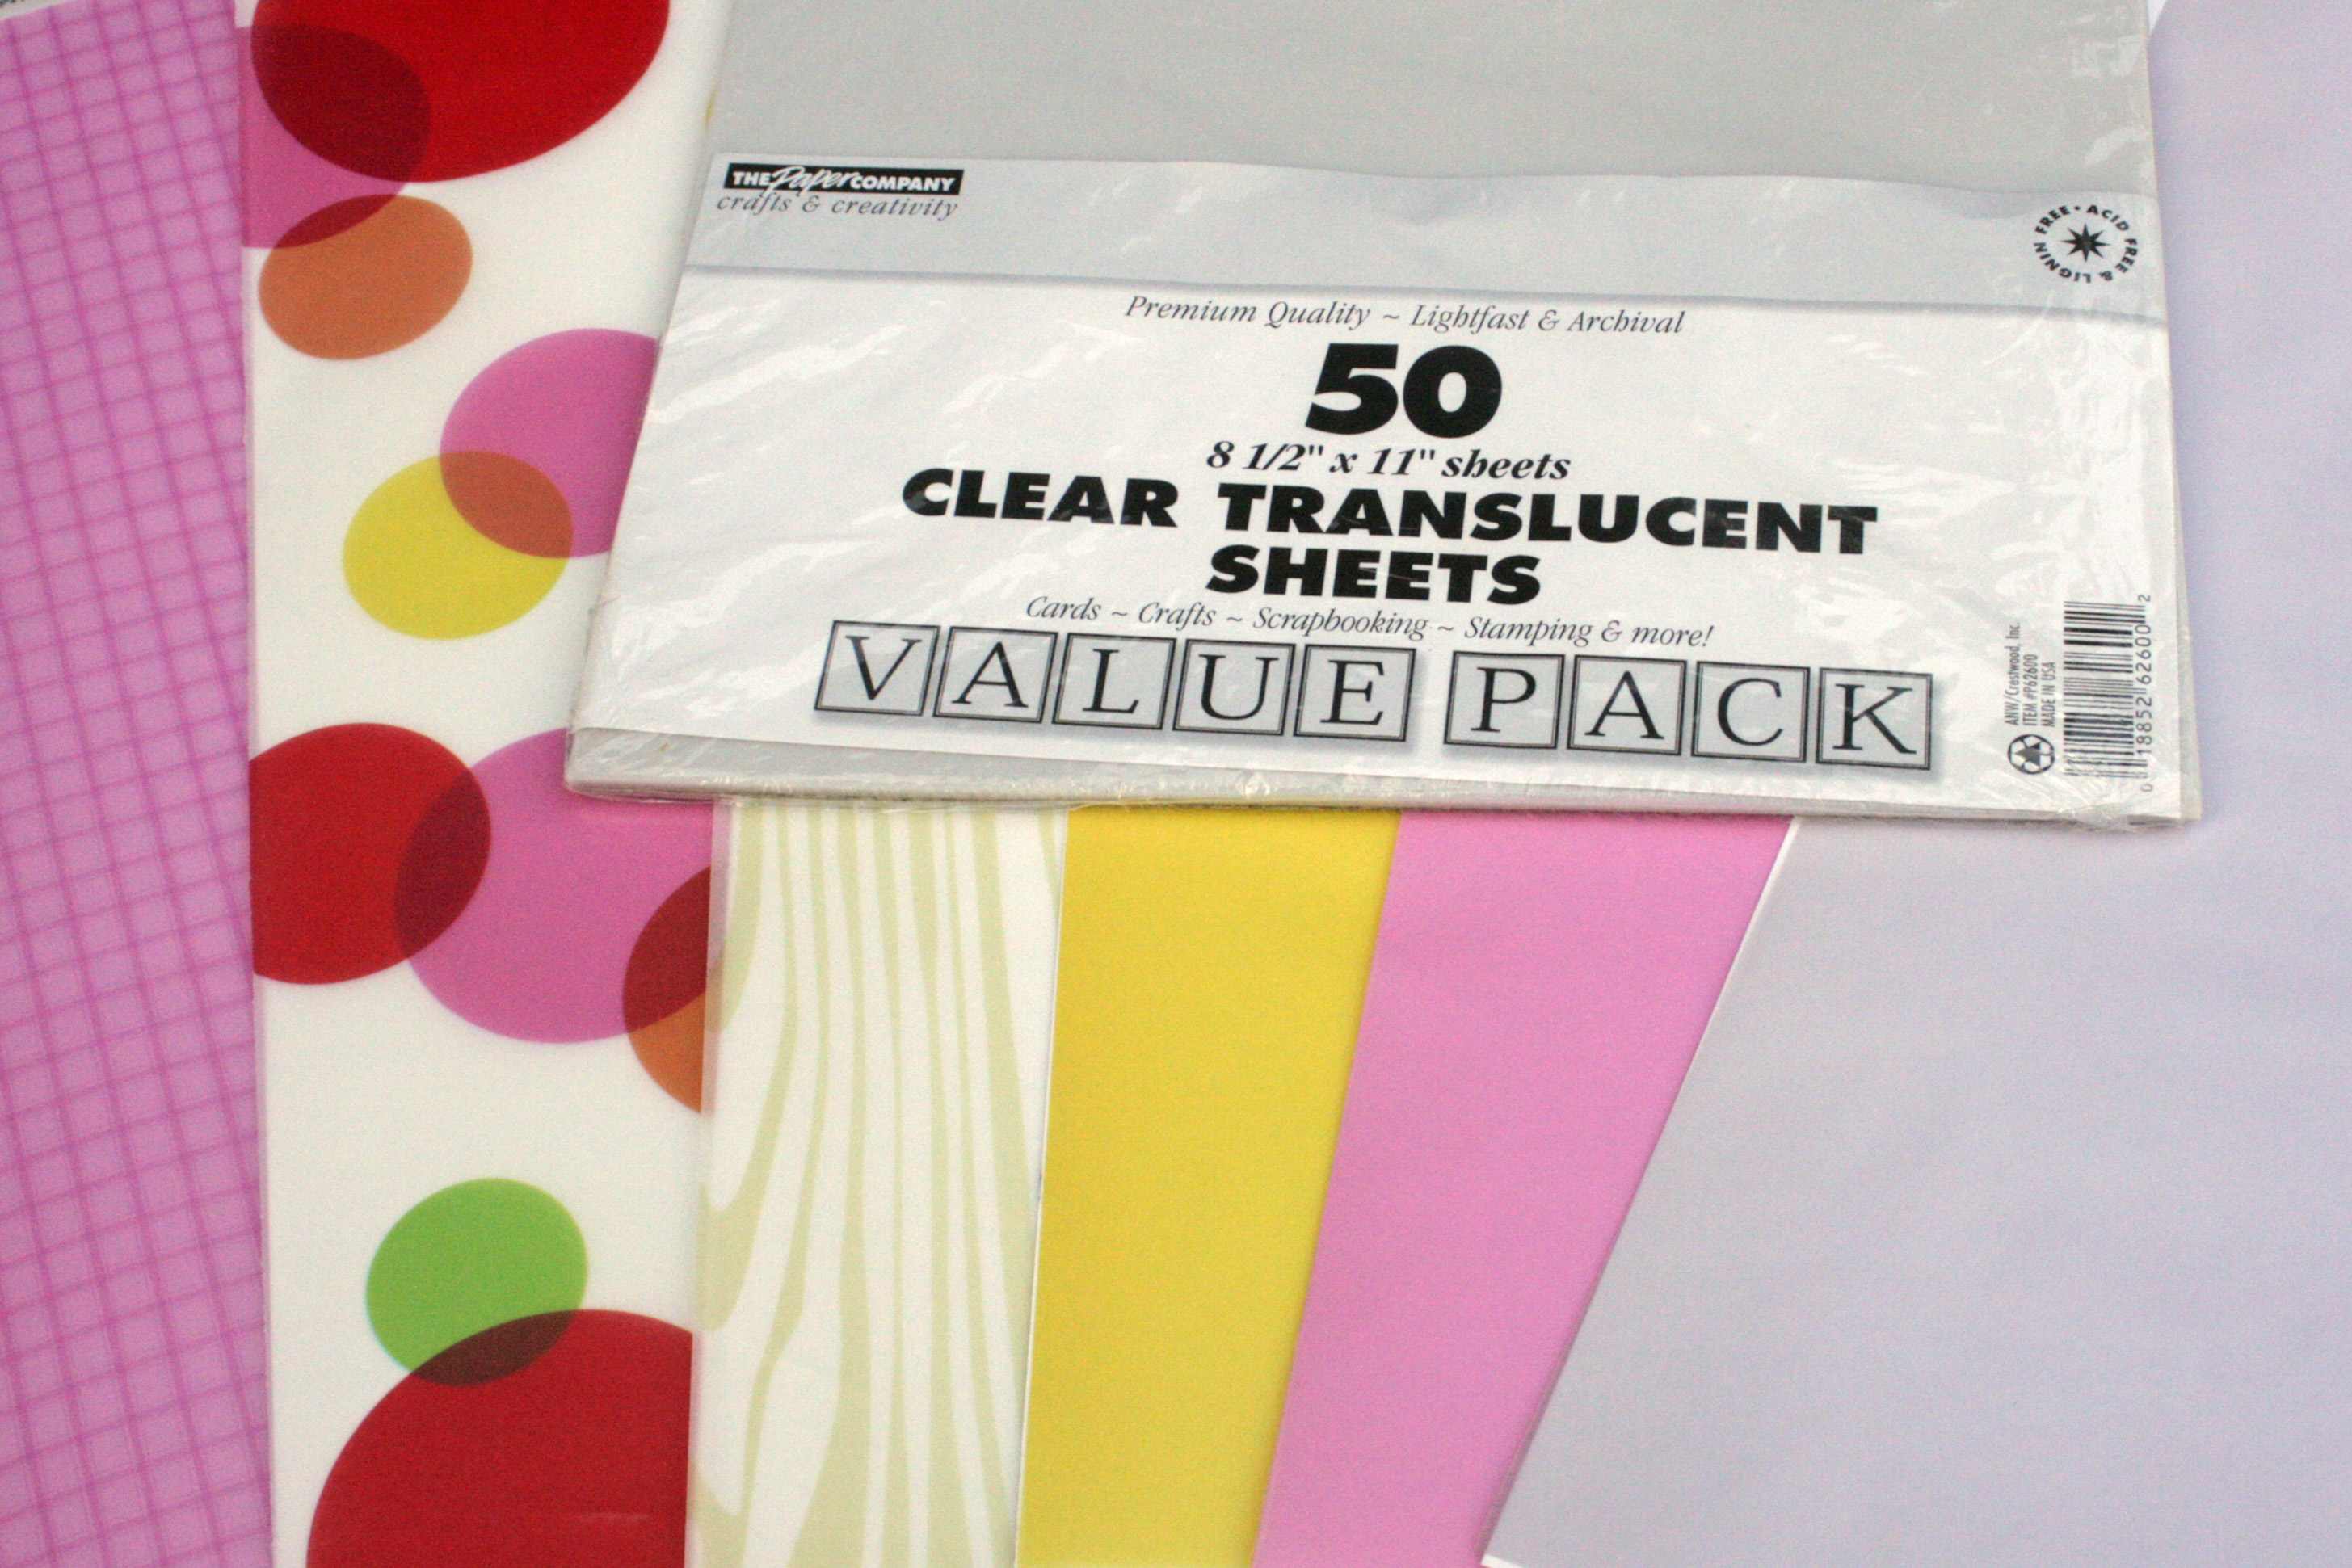
Now that we've covered a little bit about alcohol inks let's talk vellum. Vellum as some of you may already know is a plastic-like paper...it's actually made with plasticized cotton (or at least that's what wikipedia says). "Clear" vellum is actually translucent and has a greyish white hue but vellum is available in a ton of colors and patterns and in different weights (heavier weight vellum is often referred to as parchment).....


Like alcohol inks there are tons and tons of things you can do with vellum and it's pretty easy to work with if you know a few basics...
. . . . . . . . first of all...vellum is translucent, not transparent..which means if you layer it over another paper the colors will not be true colors...in the image below you can see how varied the vellum looks when you switch up the colors it is layered over...finding the right combination is just matter of trial and error.


. . . . . . . . .another little bit of info you need to know when working with vellum...although vellum is a durable paper...because of it's consistency, if you crease it, it will leave a bright white mark where it was creased ...so when working with vellum you want to be careful when handling it
. . . . . . . .because vellum is translucent, you can't just use any adhesive because the adhesive will show through...although you can find many adhesives made for vellum I find the best adhesive to use is spray adhesive...hands down the best choice...all that is needed is a light spray and you can get a great bond and you won't see the adhesive
Now that you've learned some basics about alcohol inks and vellum...now it's time to learn some basics about working with the two together....
. . . . . . even though vellum is plastic like...it isn't truly a non-porous surface..so when you use the inks on vellum they don't "bleed" or "spread" like they do on glossy surfaces. Because alcohol inks don't bleed on vellum like they do on glossy surfaces it enables you to have more control over the ink.
. . . . . . .vellum like most papers will buckle or warp if it gets too wet...especially thinner weight vellum. So when using alcohol inks on vellum you need to use some care not to over-saturate the vellum.
. . . . . . .even though vellum is somewhat porous...you can still use rubbing alcohol to remove any unwanted ink without leaving residual color.
. . . . . . because vellum is translucent you can get different looks on a project simply by flipping the vellum over after applying inks...if you want a softer look, apply inks and then flip the vellum over so the ink side is facing down...if you prefer the colors to be stronger and more vibrant, apply the inks and leave the vellum ink side up.
I'm sure there is lots more info and a lot more tips I could share but I think that pretty much covers all the important stuff. Tomorrow I'll post a project showing you how to put some of these tips to good use. Stay tuned...

Sunday, September 11, 2011

Blame it on my inspiration jar

I know it's been a while since I posted but I swear I have a really good excuse ...I've been creating!!! Actually I've been doing lots and lots of creating and it's all thanks to my awesome inspiration jar!! See lately I have been feeling like a one trick pony always using the same products in the same way over and over and over again and I really really really was in dire need of some serious creative inspiraton so I decided to bust out the inspiration jar I created a while back and boy was I inspired!! Wondering what's an inspiration jar? Just the bested thing evah! It's a jar filled with slips of paper and each piece of paper has some kind of scrappy goodness listed on it...products (like glimmer mist, ribbon, chipboard, etc.), techniques ( like stamping and embossing), colors, tools (like paper crimpers and punches), and tons more! Using it is simple...when you want to create you just select as many slips of paper as you want and you use whatever product/technique/color etc. that you choose. Simple right! I created my inspiration jar maybe a year or so ago to help me keep the creativity flowing and to help me use more of my scrap supplies...especially all those products I bought so long ago that just sit around mostly collecting dust...I have way to many of those! But for whatever reason I haven't used my inspiration jar much recently so I decided a couple weeks ago it was time to bust it out again and I am so glad I did! I pulled 3 slips and totally was inspired by the awesome combination ...vellum (remember vellum?), alcohol inks and texture!!! Since then I have been doing nothing but playing/creating and having a total blast! I really got super inspired by the products and had tons and tons of ideas of stuff to make...I wasn't even finished with the first project and I was already thinking about my next one!! I had so much fun and I really did feel way more creative than I have in ages!!! I made a bunch of stuff and learned a bunch about working with vellum and inks and even developed my very own technique so I now have tons and tons of really cool stuff to share with you all including tips, techniques, a layout and several cards and more!! I even did a video to share with you all! Make sure to check back all week because I will be posting lots of great stuff. Hopefully all the great stuff I'm posting this week will make up for being AWOL for the last couple weeks.